

The how to fix foamy milk for art problem almost always comes down to one mistake: you aerated too long. Big, stiff bubbles mean air went in when the milk was already warm, or the steam wand stayed at the surface for too many seconds.
The fix is not a new machine. It is a shorter stretch phase and a longer spin. Glossy microfoam, the kind that pours a leaf or a heart, needs only 2 to 6 seconds of air while the milk is cold.
Then you submerge the wand and let the whirlpool break those bubbles down. If your milk looks like dish soap, you skipped the spin. If it looks like meringue, you stretched too long. Here is the exact sequence, the fixes for each failure, and how to get close without a steam wand at all.
How to Fix Foamy Milk for Art?

Steaming milk has two phases. Stretch and spin. Most people do the first one for the whole time and skip the second.
Read Also: Why Is My Microfoam Too Thick for Latte Art? Fix It Fast
Stretch (aeration): The wand tip sits just under the surface. Air enters. You hear a gentle paper-tearing sound. This should last 2 to 6 seconds, while the milk is still cold, under 100°F.
Spin (texturing): You submerge the wand deeper. No more air enters. The steam creates a fast whirlpool that drags the big bubbles down and tears them into microscopic ones. This is where microfoam happens.
If you keep the wand at the surface for 15 seconds, you get stiff foam that sits on top of the milk like a cap. It will not pour a design. It will plop .
The Fix for Stiff, Bubbly Foam
Your milk is over-aerated. The bubbles are too large and the milk has split into foam on top and thin liquid below.
What you can salvage: Tap the pitcher firmly on the counter. Swirl it hard. This reintegrates some of the stray air. It will not fix badly split milk, but it helps borderline cases.
What to change next time: Count the stretch. For a 12oz drink, 3 seconds is enough. Watch the volume. The milk should increase by about 20 to 35%, not double. Once it hits that mark, stop aerating and let the whirlpool do the work.
The Fix for Thin, Flat Milk with No Foam
The opposite problem. The wand was buried too deep the whole time. No air entered. The milk got hot and stayed watery.
The fix: Start with the tip just at the surface. Listen for the tearing sound. If you hear nothing and the milk just swirls silently, raise the wand slightly. If you hear loud screeching and milk splatters, lower it. The sound is your gauge, not a thermometer .
The Fix for Foam That Tastes Burnt or Collapses
You steamed past 150°F. The proteins over-denatured and the foam structure broke down. The milk tastes scalded and the texture turns grainy.
The target: 130 to 150°F, with 140°F as the sweet spot. Stop when the pitcher is too hot to hold comfortably for more than a second.
The prevention: Start with cold milk straight from the fridge. Cold milk gives you a longer window before it overheats. If you are making back-to-back drinks, keep a second pitcher chilling.
How to Steam Milk Without a Steamer?
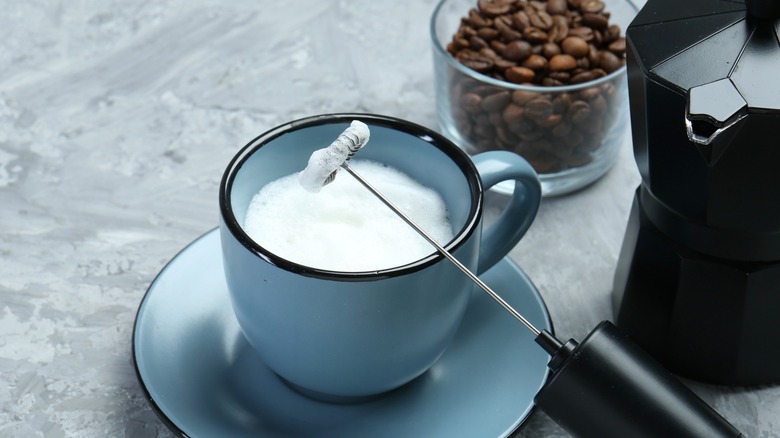
You cannot make true microfoam without a steam wand. The wand does two things at once: injects air and heats the milk under pressure. Home methods create foam, not the paint-like microfoam that pours art.
You Must Also Like: From Blobs to Beauty: Simple Latte Art Hacks for Your Home Espresso Machine
But you can get closer than you think. Here are the three methods that work, ranked by how close they get.
1: The French Press (Best Result)
This is the best home alternative. The mesh plunger does what a whisk cannot: it forces air through the milk in small, repeated bursts.
How to do it: Heat milk to 140 to 160°F. Pour it into a French press, leaving room at the top for expansion. Insert the plunger and pump it up and down vigorously for 10 to 15 seconds. The milk will froth. Pour immediately.
The honest limit: The foam is coarser than microfoam. It will pour a rough design if you work fast. It will not hold a delicate rosetta.
2: Handheld Electric Frother
A battery-powered whisk. Heat the milk first, then submerge the whisk and turn it on. Move it up and down gently to incorporate air.
The result: Tighter foam than a French press, less mess than a blender. Still not microfoam. Good for cappuccino-style texture, harder for latte art.
3: Mason Jar Shake
The cheapest option. Heat milk in a jar, screw on the lid, shake hard for 30 seconds. Tap the jar to pop the biggest bubbles.
The honest verdict: This makes bubbly milk, not pourable foam. Use it for hot chocolate. Do not expect latte art.
The Milk Itself Matters More Than You Think
Whole milk (3.5% fat) gives the most forgiving microfoam. The fat stabilizes the bubbles and the texture stays creamy. Skim and low-fat milk: They foam easily but the texture is dry and unstable. The foam collapses faster.
Plant milks: Most fail. Almond and oat milk without stabilizers split or refuse to hold air. Look for "barista edition" versions. They add gums and oils that mimic dairy's foaming behavior.
The Sequence That Works
Cold milk. Cold pitcher. Purge the wand.
Tip just at the surface. Turn steam on full. Listen for the tearing sound. Count to 3. Watch the volume rise by a third. Stop aerating.
Drop the pitcher so the wand is submerged. Angle it to create a whirlpool. Hold until the pitcher is too hot to touch for more than a second. The surface should look glossy, like wet paint. No visible bubbles.
Tap the pitcher on the counter. Swirl hard. Pour.
The Final Thoughts
The how to fix foamy milk for art answer is not a product. It is a stopwatch. Stretch for 3 seconds, not 15. Spin for the rest. Use cold whole milk. Heat to 140°F, not 160°F.
If you have no steam wand, the French press gets you close enough to practice the pour. The machine matters less than the timing. Fix the timing first. The art follows.