

You've pulled the perfect espresso shot. You've got your pitcher ready. You steam the milk, pour it into the cup, and... a thick, white blob stares back at you. No heart. No rosetta. Just a disappointing puff of foam.
I have been there. Spent months there, actually. My kitchen counter had more failed latte art attempts than I care to count. The problem is almost always the same. Your microfoam is too thick for latte art, and learning how to fix it is the single most important skill you can develop .
The good news is that fixing "microfoam too thick for latte art how to fix" is a simple process. It all comes down to one concept: you are incorporating too much air into the milk .
Understanding the Problem: Why is My Milk So Thick?

Imagine you are trying to paint with a thick paste instead of smooth paint. That is what pouring overly thick foam is like. It doesn't flow. It just plops out in a heavy, white mass.
Read Also: Premium Coffee Art Stencils for Espresso: 10-Piece Professional Barista Template Set
This happens when you over-aerate the milk . You have stretched the milk too much at the beginning of the steaming process.
Big Bubbles vs. Microfoam
You are aiming for microfoam. This is steamed milk with tiny, barely visible bubbles. It should have a velvety sheen and a consistency similar to wet paint .
When you create "microfoam too thick for latte art," you usually get one of two things:
-
Large, obvious bubbles: This means the steam wand tip was not deep enough during aeration, introducing big air pockets instead of microfoam .
-
A stiff cap of foam on top: This means you stretched the milk for too long. You introduced too much air. This creates a layer of "dry" foam that sits on top of the liquid milk, ruining your pour.
Step-by-Step: How to Fix It?
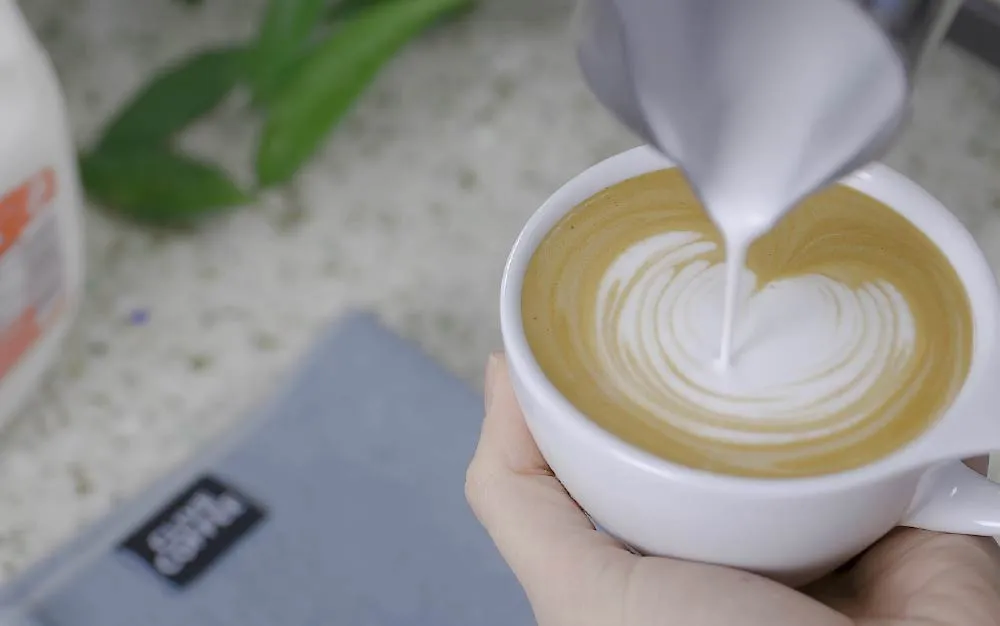
Here is the exact process I used to go from foam blobs to painting rosettas. This is the fix for microfoam too thick for latte art .
Step 1: Start with the Right Milk
Use cold, fresh, full-fat milk if you can. Whole milk (around 3.25% fat) is the easiest to steam because the fats and proteins create a stable, smooth structure .
If you are using plant-based milk, look for a "barista" version. These contain more fat and emulsifiers to hold a consistent texture .
Step 2: The Three-Second Rule (Limit Aeration)
This is where most people go wrong. They stretch the milk for too long.
-
Purge your steam wand to remove any water.
-
Insert the steam wand just below the surface of the milk. It should be only about 1-2cm deep.
-
Turn on the steam.
-
This is crucial: You should hear a gentle "tearing paper" or "chirping" sound. This is the sound of air being incorporated .
-
For a latte, you only want to hear this sound for 1 to 3 seconds . I counted "one, two" in my head and then moved to the next step. For a cappuccino, you can stretch a bit longer (3-4 seconds), but for latte art, keep it short.
Step 3: Create the Whirlpool (The Real Work)
After 2-3 seconds of aeration, the hard part is over. Now, you need to integrate the foam you have created.
You Must Also Like: How to Steam Milk for Latte Art in 5 Minutes or Less?
Submerge the steam wand tip deeper into the milk. Tilt the pitcher slightly so the milk spins in a fast, circular whirlpool . This spinning action is crucial. It breaks down the large bubbles you created and mixes them into the liquid milk, creating a uniform, silky microfoam.
Continue steaming until the pitcher becomes too hot to comfortably hold in your palm. This usually means the milk is around 55-65°C (130-150°F) .
Fixing a Bad Batch: The Swirl Technique
You have already steamed your milk and see a thick layer of foam on top. Is the batch ruined? Not necessarily.
Try this quick rescue technique:
-
Tap the Pitcher: Gently tap the pitcher on the counter a few times. This helps to pop any large bubbles .
-
Swirl Vigorously: Give the pitcher a few aggressive swirls. This can help to re-incorporate the foam on top into the milk beneath it . You want to see a uniform, glossy sheen, not a distinct layer of foam.
A quick tip I learned from a barista forum: Rest the pitcher on a paper towel on the counter and swirl it in tight, fast circles to help break up that stubborn, thick microfoam .
Products to Help You Get It Right
Forcing myself to be consistent was the only thing that worked for me. These specific items made a world of difference.
The Milk Thermometer
This is the single best investment you can make . Why? Because you can aim for a specific temperature every single time, which is key for consistent results.
By taking the guesswork out of when to stop steaming, you can instead focus 100% of your attention on the techniques of aeration and creating the whirlpool.
A good digital thermometer will give you a reading in seconds. Stop steaming right when your milk hits about 65°C. This prevents you from overheating (and burning) the milk, which also ruins the texture.
The Right Pitcher
Steaming in a smaller pitcher gives you more control over the whirlpool effect . It allows the milk to spin at a higher RPM, producing a smoother, silkier texture. Once you've mastered the steam, you can transfer the milk to a larger, wider pitcher for pouring.
Experiment with Your Equipment
Not every machine is created equal. For example, entry-level machines often have a "panarello" wand that automatically introduces air, making it very difficult to create microfoam.
In this case, you might need to remove the outer sleeve of the wand to access the smaller steam tip, which gives you manual control over the aeration process .
Avoid These Common Mistakes
-
Adding Air When Milk is Warm: The milk absorbs air best when it is cold. Finish the stretching process before the milk reaches body temperature .
-
Skipping the Whirlpool: A whirlpool is not optional. It is necessary to create a homogeneous mix of milk and microfoam .
-
Letting the Milk Sit: If your milk sits for more than 20-30 seconds after steaming, the foam will start to separate and thicken. Give your pitcher a swirl right before you start pouring .
The Final Thoughts
If your microfoam is too thick for latte art, how to fix it comes down to one thing: less air. Don't stretch your milk for more than a couple of seconds. You will be amazed at how much of a difference this makes. Focus on creating that silent vortex to integrate the foam.
Following this method took me from blobs to tulips. It will do the same for you.