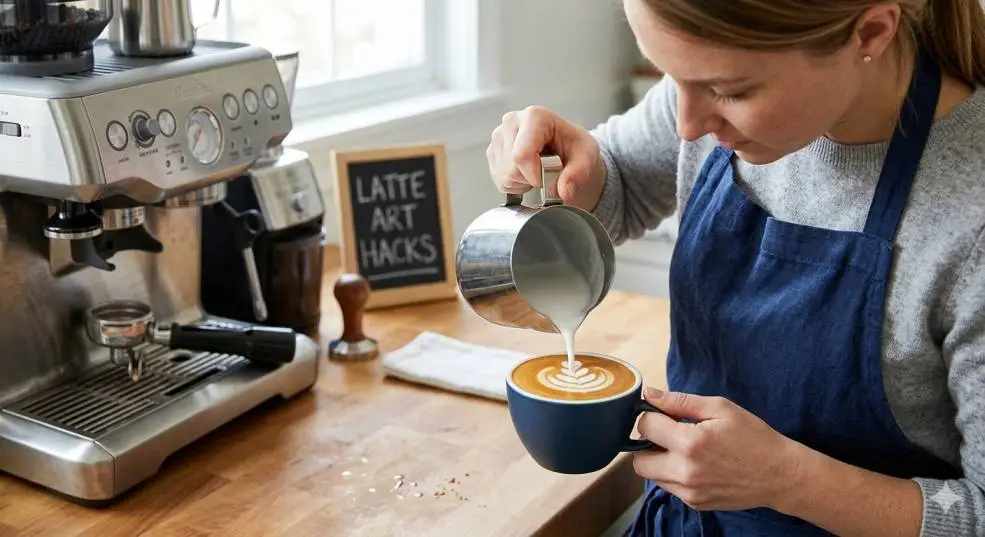

Love coffee? Wish your morning cup looked as beautiful as it tastes? Great news—you don’t need a fancy espresso machine or a barista course to create beautiful coffee art at home.
With just a few basic tools and some simple techniques, you can turn your latte, cappuccino, or hot chocolate into an Instagram-worthy masterpiece.
In this blog, we’ll guide you through DIY coffee art without a machine using beginner-friendly methods, from simple designs to pro-looking patterns all from the comfort of your kitchen.
How to Make a DIY Coffee Art Without Machine?

In India, where tea has customarily ruled, the developing coffee culture has brought with it the charm of latte craftsmanship. Latte craftsmanship is more than fair making a lovely container of coffee.
Read Also: Does Cold Brew Coffee Have More Caffeine?
It's a show of expertise, accuracy, and inventiveness. For baristas, it's a way to grandstand their mastery, and for coffee devotees, it's a delightful expansion to their coffee encounter. Latte craftsmanship changes a straightforward coffee into a customized work of art.
Have you ever strolled into your top pick coffee shop, requested your normal, and at that point not needed to drink it since the froth on best looked so wonderful? We know we have.
Latte craftsmanship is something that can brighten up your day and make that coffee involvement indeed more noteworthy, but have you ever pondered how baristas make their transitory showstoppers?
1. Start with the Right Milk
The key to good coffee art is foam. You don’t need a steam wand—just use these alternatives to froth milk:
Easy Milk Frothing Methods:
-
French Press: Pour warm milk into a French press and pump the plunger up and down for 20–30 seconds until frothy.
-
Mason Jar: Fill halfway with warm milk, screw the lid on tightly, and shake vigorously.
-
Hand Whisk or Milk Frother: Heat your milk and whisk by hand until it foams up.
Tip: Whole milk works best for foam consistency, but you can also use oat milk or soy milk for a vegan option.
2. Make a Strong Coffee Base
Without an espresso machine, use these alternatives:
-
Moka Pot: Creates a strong, espresso-like coffee.
-
Aeropress: Easy to use and makes a concentrated shot.
-
Instant Espresso Powder: A quick option for beginners.
Pour your hot coffee into a wide-mouthed cup for more space to work your latte art magic.
3. Basic Pour Techniques (No Machine Needed)
When you’re just starting, focus on these easy patterns:
A. The Heart
-
Pour the milk slowly into the center of the cup.
-
As the foam starts to rise, move the stream slightly side-to-side.
-
Finish the pour with a quick upward motion to “pull” the heart shape.
B. The Rosetta (Leaf-Like Design)
-
Gently wiggle your pour left and right as you move down the cup.
-
Then, sweep the pour line through the center of the pattern at the end.
C. The Dot
Sometimes called a “monk’s head,” this is the easiest to master.
-
Pour a bit of foam directly into the center.
-
Stop when a clean circle forms.
Note: These patterns take practice! Start with small motions and be patient with your progress.
4. Use a Toothpick or Stick for Etching Designs
If pouring freehand sounds intimidating, try etching instead:
Tools Needed:
-
A toothpick, skewer, or latte art pen
-
Frothed milk
-
Cocoa powder or chocolate syrup (optional)
Easy Etched Patterns:
-
Swirls: Drag the toothpick through the foam in a spiral motion.
-
Stars: Create dots of foam or syrup, then pull lines outward like star rays.
-
Hearts & Smiles: Use syrup for outlining, and etch in small designs.
Add a sprinkle of cinnamon or cocoa powder for flavor and finish!
5. Stencils: The Simplest Art Hack
Short on time or precision? Stencils are your best friend. Buy or make your own latte art stencils in shapes like hearts, leaves, or stars.
Related Article: What Is Nitro Cold Brew Coffee?
How to Use:
-
Place the stencil over your cup.
-
Sprinkle cocoa powder or cinnamon evenly.
-
Carefully lift the stencil straight up.
Boom—perfect art, no steady hand required.
6. Chocolate and Syrup Art
Another fun way to decorate your drink is with syrup:
How:
-
Draw simple lines or circles with chocolate or caramel syrup.
-
Use a stick to drag and form patterns (like spider webs or hearts).
-
Layer syrup between the coffee and milk for contrast.
Perfect for mochas and hot chocolates!
7. Tips for Better Results
-
Warm, not boiling milk: Keep it around 60–65°C (140–150°F).
-
Use a wide cup: Makes drawing patterns easier.
-
Practice pouring from low height: Start low to mix, then raise your pour as foam comes in.
-
Clean tools right away: Dried milk foam is hard to wash off.
Conclusion

You don’t need a café setup or expensive equipment to make your morning coffee beautiful. With a few creative tools and a little practice, you can master DIY coffee art without a machine—turning your kitchen into your personal coffee shop. Whether you're impressing guests or just brightening your morning, these easy techniques make coffee even more enjoyable.
FAQ's- DIY Coffee Art Without Machine
Can I do latte craftsmanship at home?
It's conceivable, but particularly for apprentice domestic baristas, it will be distant from perfect. Shape – It's simpler to pour and hone latte craftsmanship in glasses which have a circular shape and a bended insides. This will offer assistance the coffee and the drain to blend, and by and large make superior color and differentiate in your latte art.
How to cheaply hone latte art?
Fill the pitcher half full with cold water, include one drop of concentrated cleanser and put the fluid in the tip of the steam wand. The blend will carry on exceptionally additionally to drain and create a macrofoam if you move the pitcher gradually down until the right temperature is reached.
How to do coffee painting?
To make the light color put a little sum of coffee into a bowl. At that point include water, approximately twice the sum of coffee you fair put in. Mix this and utilize it to paint. To make the darker color include coffee into a bowl and blend in the water (around half as much coffee than you put in).
How do I foam milk?
Whisk in circles for 15–20 seconds. When the drain begins to thicken, raise your whisk to fair underneath the foam. The drain is done foaming once it has multiplied in volume. Do not disregard to switch off the frothier some time recently pulling it out of the drain.